Thursday 31 August 2017

Victorian elegance

Good afternoon and welcome to my blog,Today I am sharing a card created for the launch of Tonic Studios  easel creator and Victorian layering die sets.

Such a beautiful set of dies with so many possibilities you are only limited by your own imagination.
These sets are so elegant and work both together or separately as you can see you can make an elegant card with just a minimal amount of dies and I don't know about you but I luv monochromatic  cards .


Thank you for taking the time to visit my blog today short and sweet post today but will share more samples with you in the next day or so.

Until next time


Wednesday 23 August 2017

My Moments

Good morning everyone, well the sun is shining and it's a beautiful warm day here.Today I have a couple of things I prepped for the MY Moments launch for Tonic Studios.
Everyone loves a designer handbags and so I thought the lock and hinges would work a treat with the Kensington bag, the bag was created using craft perfect pearlescent  card stock and also satin sheen gold and mirri a perfect gift for someone with maybe a little jewellery gift inside.


For this card I used tonic adorable Baby Rococo  die set along with a lace borders strip and the English Picnic die set & also the Harrop die set but what a great way to personalise  your cards and projects with the months of the yr.


Thank you for visiting my blog today a short but sweet blog today as it's all go in the craft room lots of amazing things coming your way in future weeks and months so keep your eyes peeled you won't want to miss.


Until next time 


Monday 21 August 2017

Happy Anniversary

Good afternoon everyone, I'm on a roll today trying to get my blog up to date,it has been so busy here recently, anyway I have a card to share with you from the fabulous Tonic Studios My Moments die sets.
Very simple card to create for an Anniversary  card it could be a Ruby Anniversary  card with these colours but the Months of the yr really do let you personalise your projects as you can see on this card the waste from the dies has also be used as embellishments the little silver corners are the waste from the large lock,the tiny little hearts at the point of the larger hearts are  from the waste from the heart lock it really is worth looking at the waste that comes out of your dies as there really isn't much to put in the bin when you have a good look.


Catch you all soon 


Until next time 


The key to my heart

Good morning everyone ,hope you have all had a smashing weekend, it's been a busy week here as I decided to have a huge clear out in my craft room well what a huge job it turned into all to make space for a new desk arriving on the 30th  ,so much stuff that I have collected over the yrs anyway I decided to sell some and the rest will go to the charity shop but boy it feels good to get more organised that's for sure.
I have also been busy with prep this weekend so have made a mess already  but today I would like to share a bit of a mixed media project I made using Tonic Studios My Moments  die sets Hinges & Locks.
The heart was  cut using the affections die set and you need to cut 4 of the hearts in a thick ish card stock 300gsm was used for this  the top layer was ran through an embossing folder then glued flat to the other hearts it's has a really good  feel of chipboard ,then using a whole punch punch a hole at the top to thread ribbon through to hang it up and some satin co ordinating ribbon .

The next step was adding a mix of colours of nuvo mousse rub the mousse into the heart until your happy with the look then using some pink nuvo Mousse in a spritzing bottle I gently spritzed the heart and gently dried it with a heat gun. Next I used a stencil and using the nuvo Glimmer paste in emerald green just added a bit of design here and there and left it to dry naturally which took 5 mins.
Next cut the rococo keys and just snip one out with scissors  you need to cut 3 of these and stick them together and also do the same with the sentiment and like before added the nuvo mousse  these were then stuck down with deluxe nuvo glue and then to add the my Moments lock the base of the lock was cut in black card stock next layer was also black edged with a little silver nuvo mousse and then the top layer in silver mirri card this was then stick to the heart ,just a nice little gift or wall hanging for your home .


I am very new to mixed media myself but just wanted to have a go ,now I have I will definitely be having another bash at something else.   

Until next time 


Friday 18 August 2017

My Moments hinged box

Good morning everyone  and welcome to my blog ,Today Tonic Studios have a brand new launch My Moments which is a collection of Months of the yr Locks,& Hinges ideal for memory albums,scrapbooking and if you have the Tonic Oxford Box that would be a great addition but also in your card making and box making.


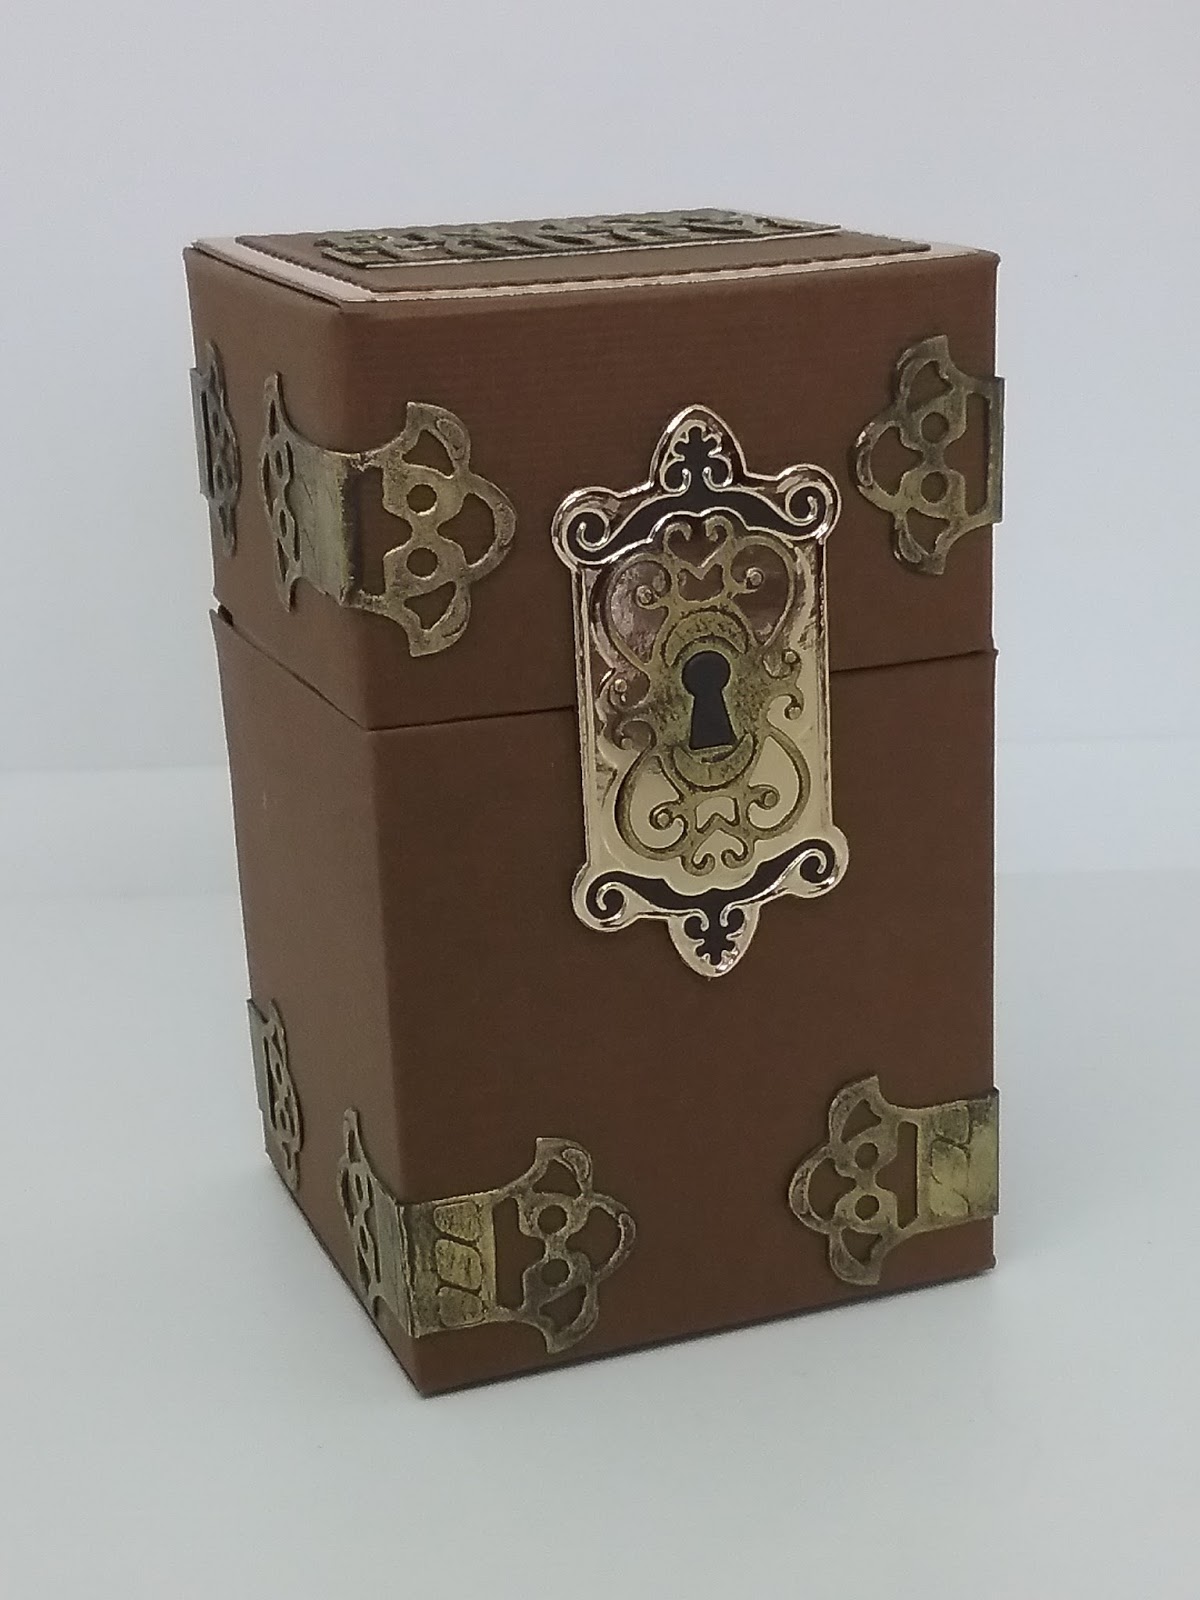
Today I am sharing a box I created using the Hinges and one of the locks which were cut from mirri card and then distressed with some gold bronze nuvo mousse to add that slight rustic look.

Flush fitting hinged box


  How to make the box
Base card 11 3/4" , x 8 1/4"
Score long side at 2 3/4" , 5 1/2", 8 1/4" , 11" turn the card and score at 2 3/4", & 5 5/8"
Lid for the box
Card 11 3/4", x  6"
Score long side at  2 3/4",5 1/2", 8 1/4",11" flip card score at 1 5/8", & 3 1/4"
Insert of the box 
Card 11" x 7 1/4" Score at :-
2 5/8", 5 1/4", 7 7/8", 10 1/2" flip card and score at 3 5/8" 


When you have all the pieces of card scored you will see you have to snip from the bottom to the score lines to create the base and lids the insert just slides into the base ,to create the hinge for the lid it's just a scrap of card scored in half and one side glues into the base of the box before you put the insert in then add the insert and then glue the other part of the hinge to the inside of the lid but if you didn't want a hinge lid just leave that part off. And then it's time to decorate the box with the Hinges & locks you can also add a sentiment ect to the lid of the box to match the occasion  ,the Hinges were cut from black card stock and added gold Nuvo mousse to add a rustic old look.

Hope the measurements help if you need a hand just leave a message in the comments or contact me on FB and I will be happy to help
Have fun 


Thursday 3 August 2017

Tudor Town Street

Good morning everyone,welcome to my blog ,Today I am going to share the absolutely fantastic Tudor Town die sets from Tonic Studios ,these have been so well designed the way  the window on the emporium-toy shop  its fantastic and so easy to make.
The construction of this street was building  3x of the shops a pub and church once I had decorated each building I threaded a battery operated  set of led light just into the base of each building  and they were available from the local £1 stores ,once all the lights were threaded through I then glued the bottom flaps shut .Then I glued all the buildings flat with hot glue to a piece of foam board


This is the street in the dark with the lights really bright  the windows are made with vellum,the smoke for the chimney is little pieces of tulle .
The lights are fastened to the back on its side so you can turn it on and off without a problem and also slide the cover off to change the batteries easily enough.
Added decoration was to cover the foam board with Nuvo  Moonstone Glimmer paste and I did use an entire pot I also added a Trio Snowman just outside the toy shop as the children had been playing outside and then placed some of the Dimensional Xmas trees to each end of the scene and also placing one outside one of the houses next to the George & Dragon.
The church windows were coloured with Nuvo Alcohol pens to look like stained glass.


I hope you all find the Tudor Street inspiring and have a go ,you will have so much fun I promise.

Thank you for taking the time to visit my blog today


Until next time 


xxx

Alluring Perfume Bottle gift boxes